AI generate images are popping up everywhere from beautiful eye catching profile pictures to weird surreal compositions, there is really some amazing AI color pixelated stuff going around the interwebs.
As soon as I saw this I wanted to learn how to do it but with my own images, so here is how I did.
To get our hands dirty as fast as possible I will omit some explanations however that should not hold us from achieving the goal of this guide, generating AI images of ourselves for free.
I do hope that once you get this going you will be hungry to learn more.
Lets go!
Before we start we will need a few things though.
- – Between 7 to 10 images of yourself or the subject you want to create the images of, make sure there is only 1 person in the images and is in different angles, make sure all pictures have the same file name – select them all and rename them, I name them vlad2022, it also helps if you crop the images to 512×512 easy and fast way is using birme.net, drag them there and position them accordingly making sure the subject’s face is vissible and then download the images.
- – A Hugginface API key to be able to download the base model(Stable Diffusion), just create an account there, login, click on the circle on the top right > settings > access tokens, generate a new one I name it “gcolab” and set it to “read only” copy it and keep it handy you will need it in a bit.
- – At least 15GBs in your Google drive.
- – Some coffee or hot chocolate because the training of the model will take around 1 hour.
Once ready let’s start.
1 – Go to the fast-stable-diffusion repo and click on “DreamBooth” it will open a Google Colab page, this page is divided in sections and each one has a “Play” button to run them one after the other wait for each one to finish to move on, you will see the progress at the bottom of each section.
2 – Make sure to login with the Gmail account, the first section is to connect to your Gdrive it says something like “from google.colab import drive…” Click on the play icon on the left, it will ask you for permission to access you Gdrive.
3 – Click the “Play” button on -“setting up the environment”- section, it will take a couple of minutes, then move on to the next section “Downloading model” here take the Hugginface API key from before and paste it on “Hugginface_token” field and click the “Play” button of this section.
4 – “Dreambooth”- section for “Session Name” I used the name I put to my images -vlad2022- and click on “Play” move on the -“Instance Images”- click “Play” you will get a button to upload the images from your computer, since you already cropped the images uncheck the “crop_images” box, click on “Play”.
5 – This is the part that takes long, – “Training” – I notice that 3500 steps seems to give me good results so on “Training_steps” field set it to 3500, scroll down to “Save_Checkpoing_every” and set it to 0 the same as “Start_saving_from_the_steps”, click on “Play” This took in my case almost one hour, just don’t forget about it or you will get disconnected, good thing is that it will save the files to the Gdrive so next time you don’t need to run the training again, will create another guide explaining how to use previous trained model.
6 – Final step is -“Test The Training Model”- section.
on “Session_Name” enter the name you typed in the “DreamBooth” section, in my case was vlad2022, click on the “Play” it will take a few minutes then at the bottom of this section in the progress area you will see a link that says “Running on local URL: ***” click on it and it will open a page with a “Click to Continue” button click on it and a user interface called Automatic1111 will pop up, this is where you can just start typing the description(prompt) of the image you want, make sure to use the name of your instance when referring to your image, in my case vlad2022 which was the same name of the image files.
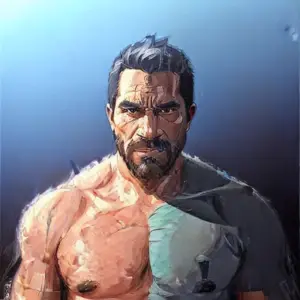
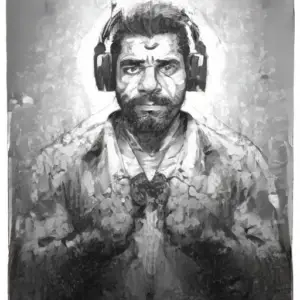
Ex: A portrait of vlad2022, in the God of War universe, rough, illustration, concept art, trending on Artstation.
You can get some ideas for prompts from places such as Lexica check it out.
And that is it. You should be up and running in about an hour, you can decrease the number of steps to 1500 it will be much faster and I have read about some people getting good results, I guess is a matter of experimentation.
I hope your find this guide useful and would love to see your creations.
Let’s go!